Secrets of Speedplay
For my own riding I’m using two pedal systems today, and I really like and appreciate each. The two I’m riding are Garmin Vector 3s, and Speedplays. Garmin’s pedals are cross-compatible with Look’s KEO pedals. The big deal with Garmin’s pedals is that there’s a power meter built in of course, and once Garmin chose to become an actual pedal maker – rather than partner with a pedal maker, which it did in the earliest versions of the Vector pedal – the actual pedal function itself improved.
So, good pedal, the Vector 3. The reason I like this pedal is that I can use this pedal to cross-reference the performance of other devices that either deliver resistance or calculate the power I’m producing.
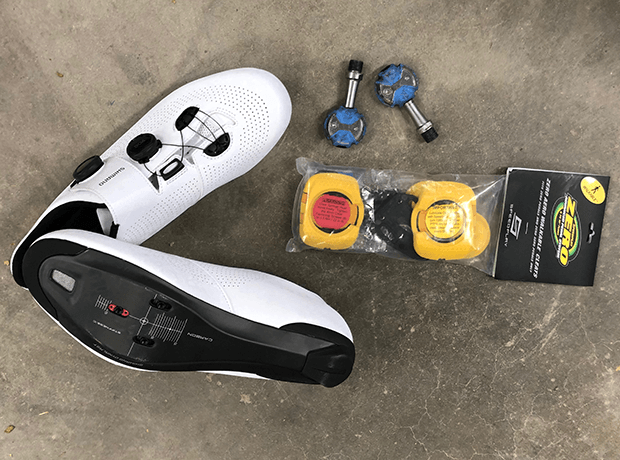
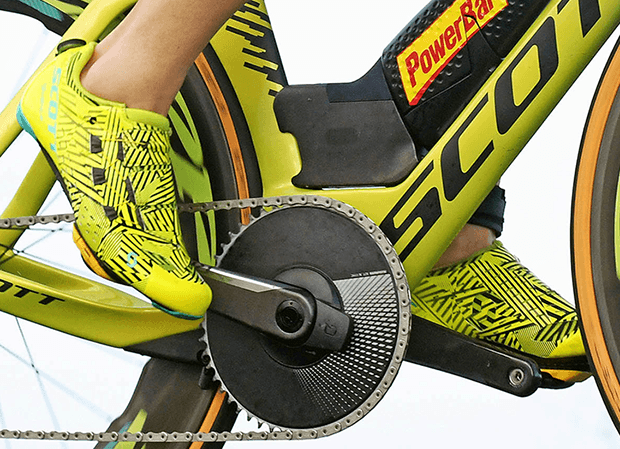
But today it's Speedplay and I’m going to show you how Speedplay pedals are mounted, and when I do this I hope to impart a few of the virtues of this pedal, and why the very best athletes in no-draft triathlon tend to choose this pedal. I will follow this up (in another article) with a discussion of Garmin pedals because, while the 1st and 3rd place in Kona were in Speedplays, the guy in between was riding Garmins.
I’m writing about the Zero, Speedplay's ubiquitous road pedal. It is lightweight, it’s aerodynamic, it’s pretty easy to walk on, and all of this makes the pedal a good choice for triathletes. It’s also easy to step into, because it’s got 2 sides, you can step into either side, and it would be a great pedal for cyclocross if it was better at shedding mud. This is the pedal’s Achilles heel (Achilles sole, actually).
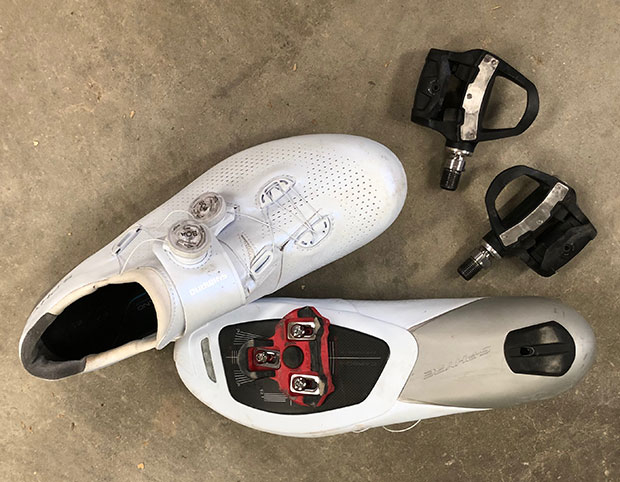
I acquired 2 new sets of shoes for this. Both are Shimano. I wanted to test both the RC9 and the RC7, to see whether the RC9 was really worth the extra money, or whether you’re fine with the RC7. I mounted the Garmins on the 9s (in the image just above) and I’m mounting the Speedplays on the 7s (in most of the other images here). It’s not that I’m made of money here. It’s that my old Bonts (in the image below) had served me well, but after 8 years of using both the Bont tri and the road shoe they finally just wore out, and there wasn’t any more use in them.
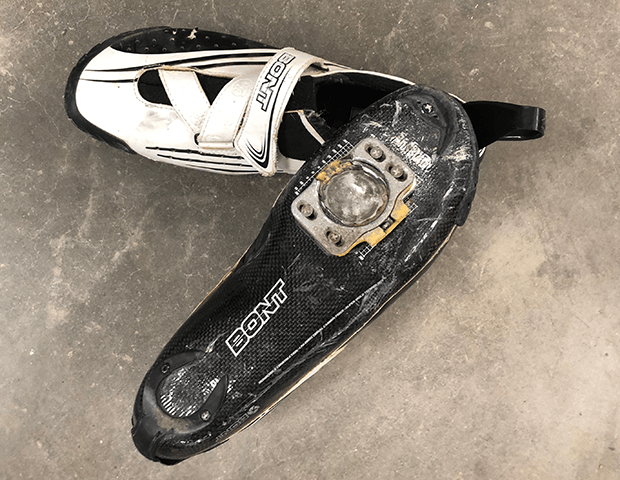
I’ll write about the Shimano shoes separately, but the process you see here is the mounting of these pedals on Shimano SH RC701.
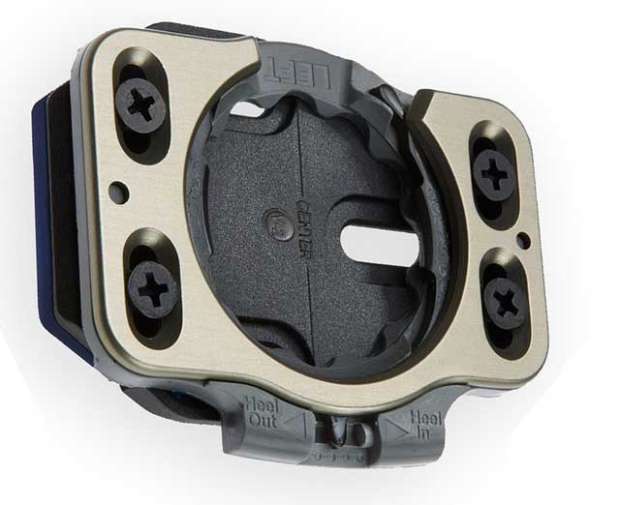
Here’s where Speedplay pedals are often not understood. A good deal of their functionality is in the cleat. You’ll see here a set of cleats, and they cost $55, and you might think wow, that’s a lot of money for a set of cleats. But the spring system and adjustability (which I will demonstrate in a very short video below) reside in the cleat. This cleat attaches to a shoe, or to the included 3-hole plate, with 4 screws.
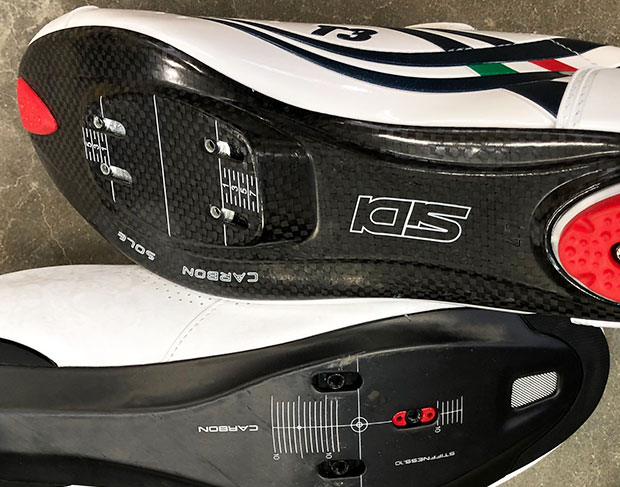
There are shoes that are Speedplay-native I guess you’d say, and above is a Sidi triathlon shoe so-constructed. You'll see its 4-bolt pattern and it's next to the Shimano RC7 that has the more typical 3-bolt mounting pattern. Note that in the Sidi shoe it's not just the bolt pattern; the sole of the shoe is built up so that the surface is flat. If your shoes don’t go into Speedplay pedals easily; if you perceive there’s any rock in the shoe when using Speedplays; it’s because the cleat isn’t mounted correctly. The Speedplay cleat must be mounted to a flat surface, not a concave surface. Hence the way this Sidi is constructed.
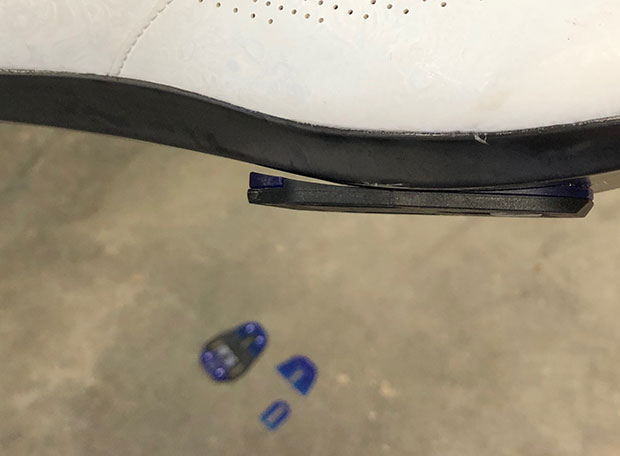
If you don’t have a Speedplay-native shoe, no problem. Speedplay’s cleat kit includes the plate that transforms a 3-hole shoe into a 4-bolt, Speedplay-ready shoe. However, that plate that performs that transformation must be mounted flat against the shoe. Speedplay’s adapter plate is concave on one side – matching the concavity of the cycling shoe – and flat on one side, presenting a flat surface to the Speedplay cleat. But that plate wasn’t concave enough, as you (above) can see.
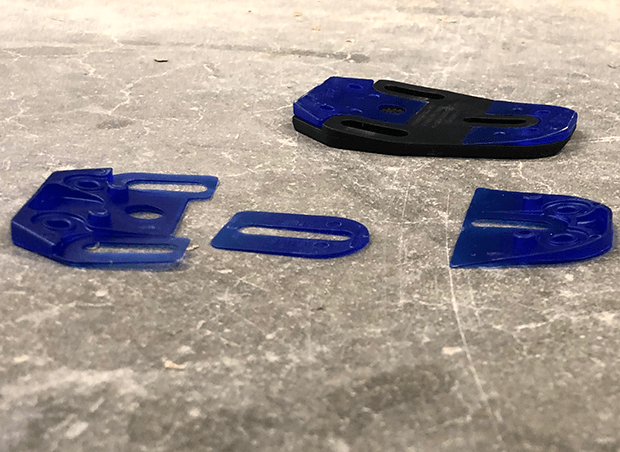
Not to worry. Speedplay’s cleat kit includes a second set of (purple) plug-ins that replace a set factory installed plug-ins, giving the adapter plate a more concave aspect. It takes just seconds to pop out the pre-installed purple inserts and pop in the more concave inserts. This swap-out makes the cleat fit the bottom of my Shimano shoe perfectly as you can see.
One word: I would still apply a straight edge to the adapter after it's tightened down, and make sure it remains flat. If not, you may have over-tightened the screws. Failure to mount the Speedplay cleat to a planar surface is almost 100 percent responsible for any problems a user might face.
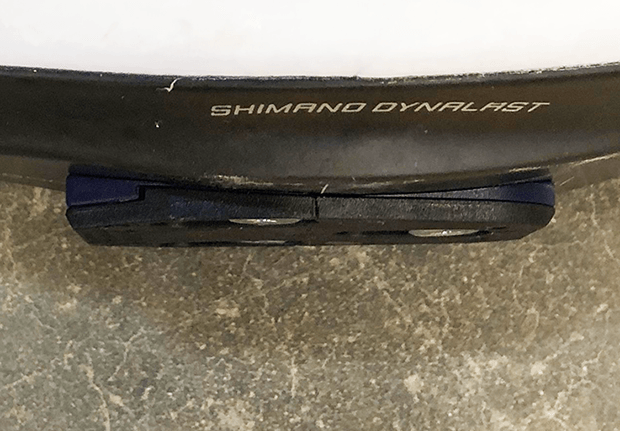
As you see just below, I push the plate all the way back on its adjustment slots, because this is my default starting place. I’d rather have the cleats too far back than too far forward when I'm riding. If I find I need to repent, and move them a little forward of this spot, okay. But I rarely find the need to do that.
I’m not going to get into the discussion of fore/aft cleat mount today, because religious fervor attaches to the views of bike fitters and shoe sellers on this topic and I’m not going to get taken sideways by that discussion. There are also shim kits – wedges that go in between the shoe and the cleat – that varus/valgus cant your shoes, and I find this process of value, but I’m also not going to delve into this, because it’s worthy of its own discussion.
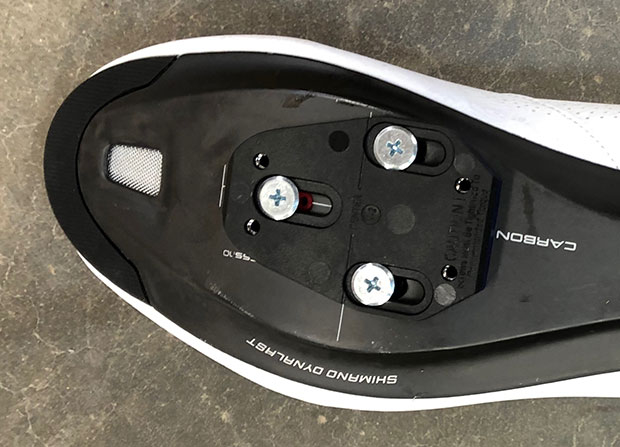
Now we have a shoe that, with this adapter plate, is the functional equivalent of that Speedplay-native Sidi shoe. You might say, heck, a Speedplay-native shoe is what I want, because I don’t want the extra height of a mounting plate. I want my foot as close to the pedal as possible. But as I measure this, there’s little-to-no difference in height between the centerline of the pedal and my foot regardless of the system used. It isn’t that the Sidi shoe omits the mounting plate. It’s that the shoe embeds the mounting plate into the construction of the shoe.
When I place the actual Speedplay cleat onto the mounting plate, there’s some left-to-right adjustability. This makes your “stance width” either wider or narrower. One of Speedplay’s historic selling features is the number of spindle lengths available (you can buy the pedal with a bunch of spindle lengths, from 50mm to 65mm). However, moving this plate from side to side effectively gives you something like 2 or 3 of those spindle lengths. If you find (for example) that your large, wide feet cause the medial side of your shoe to brush the crankarm, just loosen those 4 screws and push the cleat all the way to the medial side of the shoe, which pushes your shoe outboard and away from the crankarm.
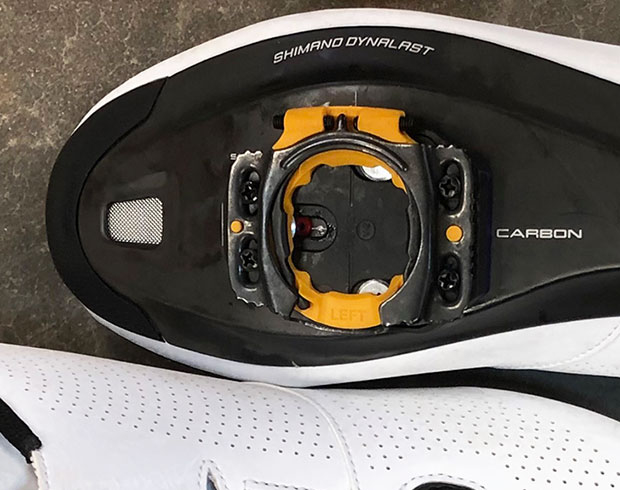
Now we get to the part of Speedplays I like the best, and this has to do with one of my particular pet peeves. I’m anal-retentive, or compulsive-obsessive, or borderline or manic or whatever about… float. Precisely, the amount of float, the degrees of arc in the float, and where the pedal engagement starts and stops both on inward and outward rotation. The adjustment for this is on the cleat – not the pedal – and I made a little 40-second video to show how this works. Note that this adjustment is done before I place the walkable cover over the cleat. That cover shields the adjustment screws, so you need to pull that cover off in order to perform this adjustment.
What I find is that I don’t need much float. I just need what I need, and no more. But more importantly, I need it precisely where I need it, so that it engages the spring retention at just the right place. I don’t want to have to keep unscrewing, loosening, the 3-hole cleat, to rotate the cleat, screwing it back down, hoping I got it right. This is the big Speedplay feature for me.
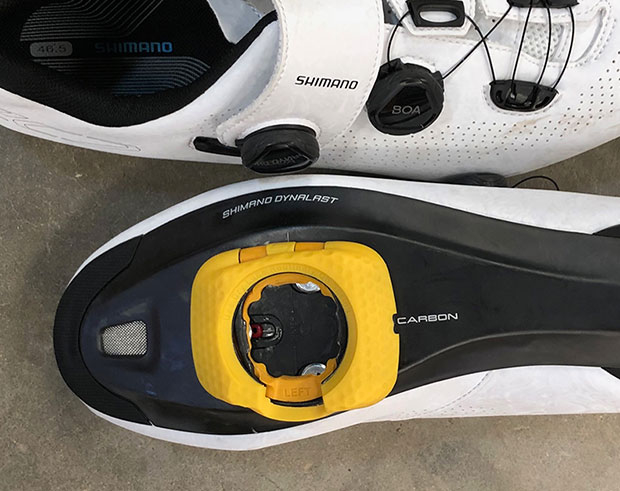
Once I have this adjusted, I put on the walkable cover and I’m done. Speedplay also gives you a plug that twists and locks into the cleat if you want to run a marathon in the darned things. Fine.
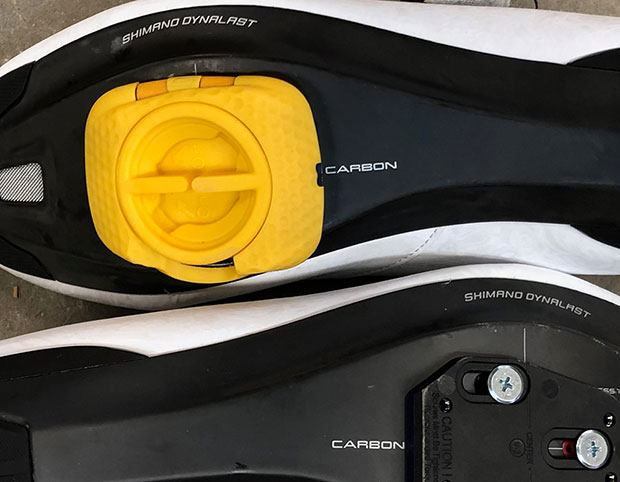
And that’s it! When you mount them properly, they’re rock solid. I can almost promise this article will bubble up the anti-Speedplay mythology based on appearance rather than truth. There is no mechanical, physics-based argument that holds water. That the “base of support” is too small. Hogwash. The base of support appears small because the cleat and the pedal functions are largely reversed in this pedal versus a typical pedal. The actual area of contact between the cleat and the pedal is pretty similar, whether it’s Look, Shimano, Speedplays, Egg Beaters, ATACs, what have you.
If you'd like to see how these pedals are priced, and various cleat options (like Light Action) here's the page on Speedplay at MyBikeShop.
I’ll write about various pedal systems as the Spring progresses. This is broadly part of our "Fit It!" series, where we solve your saddle problems, and we've started a thread today devoted to solving your pedal/shoe problems.
I thought I’d start with Speedplays because, well, I’m lazy, and I had to mount some pedals to some new shoes, and I thought if I took some pics of the process I could kill two birds. Bird killed. Happy cycling!


Start the discussion at forum.slowtwitch.com