Internal Cable Management
Is bike ownership simply an unfortunate necessity to you? Or a hobby? Because if it’s a hobby, two tasks will drive you crazy if you can’t wrestle them down: Hydraulic brake bleeding; and internal cable management. I’m writing today about the latter.
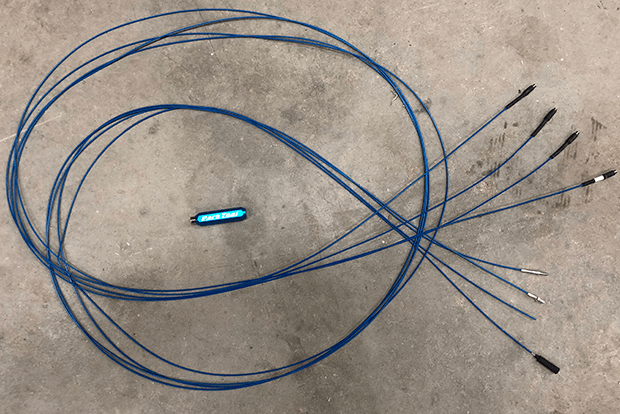
The major themes here are tools, technique, and workflow. By workflow I mean the order of the tasks in a bike build – what parts you put on the frame first, then second, and so on. Let’s talk about this now because once we get a little further below I’m going to pivot to tools, including a product from Park Tool: the Internal Cable Routing Kit: IR-1.2 (in the image below, shown out of its plastic case and on my shop floor). Back to workflow…
When I was young whippersnapper, we began a bike build by applying our cutting tools to the frame: face the head tube, ream the inside of the head tube for press fit headset cups; face and tap the bottom bracket shell; tap the derailleur hanger threads; align the dropouts, fork ends and the derailleur hanger; and then we commence building up the frame. (But at least the cables ran external to the frame, which made up for all that!)
After the fork is installed, then I would install the bottom bracket and the crankset. That was then. Not now! How many times have I had to uninstall the crank and the BB, because my rote brain stem behavior overrode the imperatives of today’s bikes? (And the violent abuse of a pressfit BB extraction is a part of the sausage factory you don’t want to see.)
The BB and the crankset is now the very last thing I install or, at least, it’s not installed until after all the internal cable routing is done. You very often can’t route mechanical shift cables (to either derailleur), or electronic wires to the derailleurs, or wires to the battery, or hydraulic rear brake line, with the BB installed.
If you look at a frameset like this – the Quintana Roo PRSix2 that I built up over the weekend – this company is doing you favors. You see the vinyl liners for rear brake and for both derailleurs? I put SRAM AXS on this bike, so, I didn’t need the shift cable liners. But I left them in there anyway, because too often I’ve taken a liner out only to regret it later.
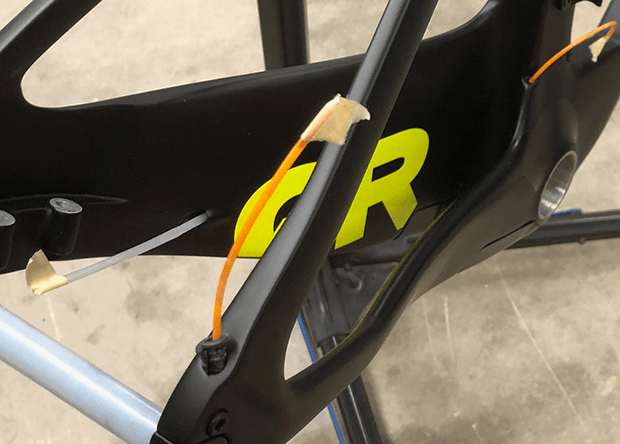
I had to take out the liner for the rear disc brake (that opaque white liner you see above), because this liner is for a mechanical disc brake cable and I’m using a hydraulic system. You have to get that hydraulic line from the back through the frame and exiting up at the front. You have to go in this direction because the hydraulic hose comes pre-attached to the brake caliper and not the lever. But that vinyl liner still becomes a useful part of the hydraulic routing process.
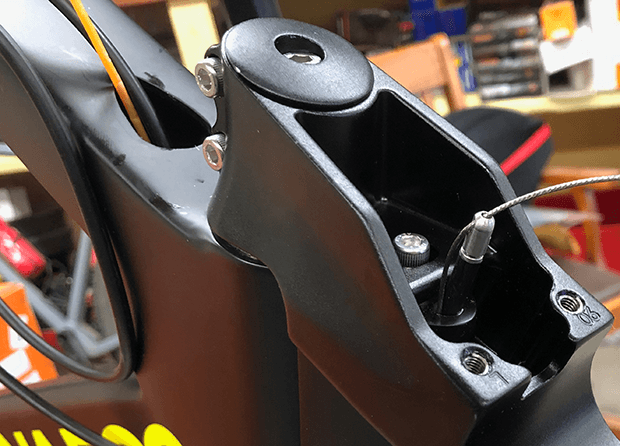
Taking SRAM as an example, there’s a dome-shaped fitting on the hydraulic hose line, it’s threaded on the Stealthamajig (SRAM’s nifty hydraulic brake needle/olive hardware) and that fitting is only for cable routing. I threaded a shift cable through the lining from the front of the bike to the back, and then I passed the shift cable through a hole on this fitting. The PRSix2 had openings just big enough for the hydraulic line and the shift cable running adjacent to it. I pulled the shift cable, out came the vinyl liner, and in came the hydraulic line right behind it. You can see that technique employed in the image below, just in this image I'm routing the hydraulic line up through the fork and stem from the front brake caliper.
The process of building a bike from the frame up, the workflow, begins (!) with the routing of everything that must go through the bike’s structure: the frame, the stem, the pursuit bar and the aerobars. Let’s talk about the tools I use for this.
They are as follows: Of prime mention is that Park Tool IR-1.2 Internal Cable Routing Kit, that comes in a little plastic box and has 4 strands of 250mm poly coated metal line, like a really thin shift cable. There is a big fat and quite strong magnet that comes with this kit. Each of the strands has a different fitting, including one that accepts a Di2 wire. On the other end are small magnets.
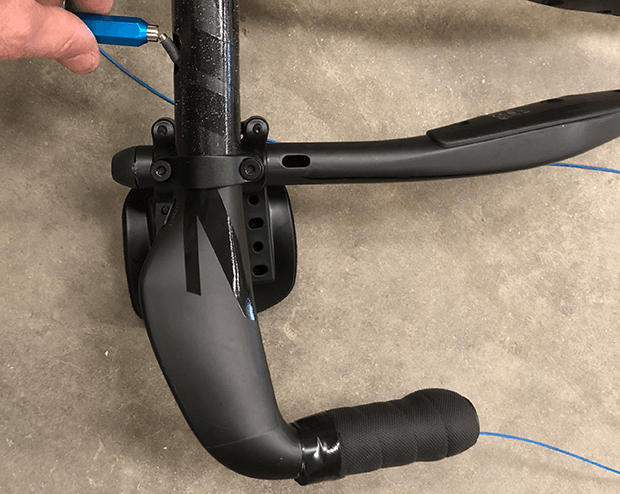
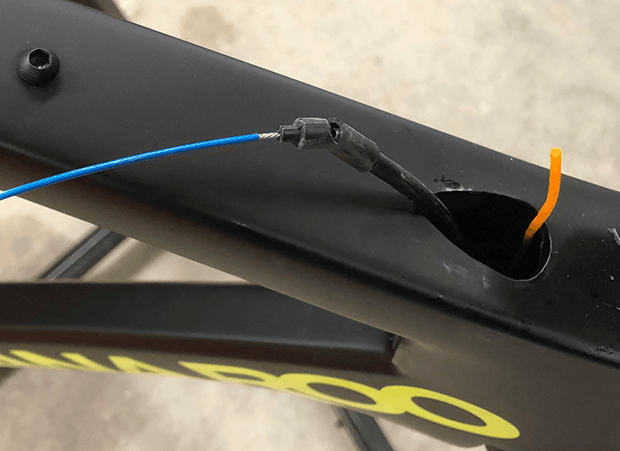
The included magnet is so strong its attraction is felt by metal objects on the inside of the carbon. I often use the magnet to pull, from the outside, a cable along through the inside of a frame, and line it up with the exit hole. (This is the technique used in the image second from the top.) It can be a real bear when that exit is offline from the natural path a trace line takes, such as hydraulic lines through fork blades: Somehow that pilot cable I pass down from the top of the bike is supposed to take a left turn and exit the fork blade? By itself? A strong magnet run along the outside of the fork blade can guide the shift cable along the inside of the fork blade, and right to that exit hole.
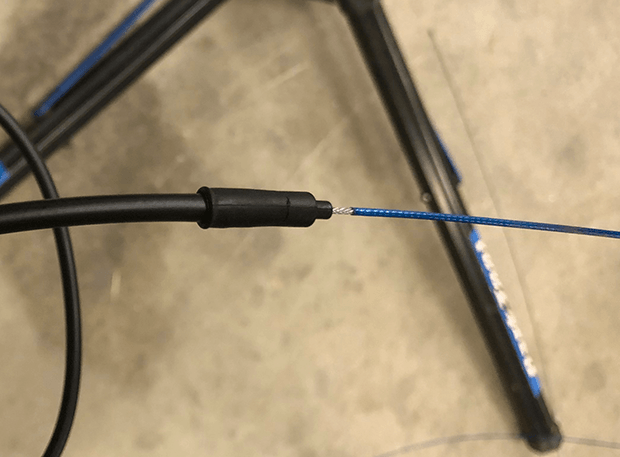
Note that one of these strands in this Park took kit has no fixture on the end. One can use this instead of the trusty shift cable that I’ve used for so many years and, in this case, you don’t need to keep using expensive shift cables for this job.
My only beef with this kit is that one of my favorite fittings is a boot, inside of which I can place something to be pulled along (as in the image above). But the rubber is very fragile in that boot and lasted not very long, as in 1 day (!) before it broke. Below is that boot after seeing very little action. I asked Park about this. They replied that it’s not covered under warranty. I can buy a new single replacement strand for $21.22 and, I assume, shipping. (The entire kit is a $65 item.) What they wrote me is that, “We cannot control the inside finish of a frame.” Yes. But the frame companies aren’t making their frames to perform for your boot; your boot must perform in their frames.
Mind, I did not ask Park Tool for a replacement strand. I didn’t make a warranty claim. What I asked Park Tool is whether I could buy a single strand (which they answered) and whether they, “had this problem reported before? Do you think there's a stronger compound that might be better?" Which they didn’t answer. So let me answer. The entire kit is great, and this part is great, just, when Park Tool introduces IR-1.3 the boot should be made of a more robust rubber compound.
My other “tools” for internal routing (in the image below) are a set of picks, and you can see a couple of sets (I have way more picks than you need, and I didn’t show my total embarrassing oversupply). Then there’s an old-style elbow spoke. I use this as a pick. Truly, I use spokes like this for a lot of things. Just like toe straps, they were meant to serve a function and though that nominal function no longer exists I seem to have a lot of reasons to have these around.
What is not shown in this image is a shift cable. I use these a lot for trace or pilot lines. I have to train myself to stop fouling my shift cables and instead use the line provided in the Park Took kit. You’ll also see a magnet in the image, but this magnet, as opposed to the Park magnet, is meant for sticking into places, attracting a shift cable or whatever it is I’m hunting for, and pulling it back out.
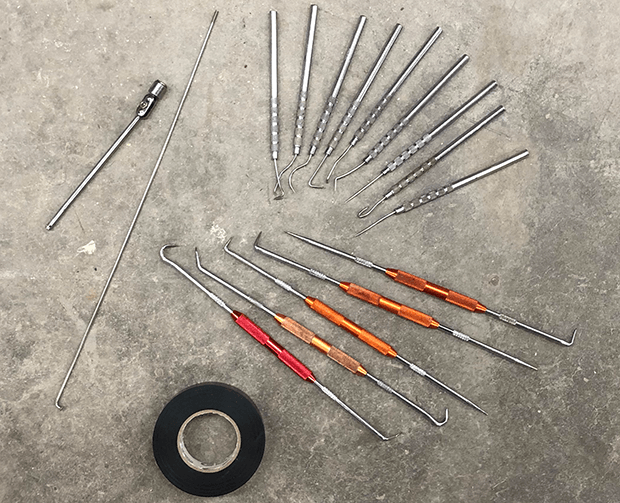
Also here is plastic tape, which I often use to tie a Park line, or a shift cable, to whatever pilot line it is to whatever it is I’m dragging through the frame.
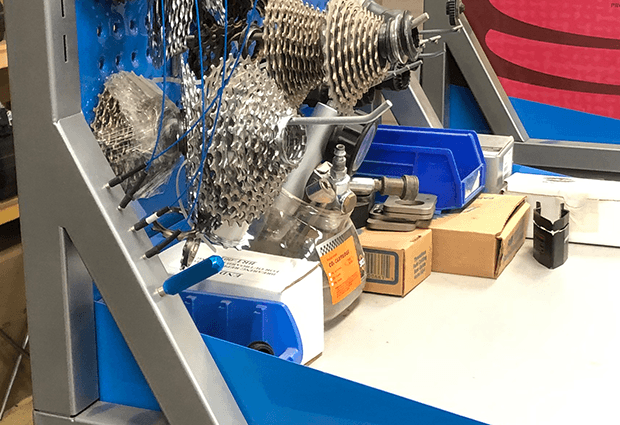
The last thing I’d say about this Park Took Kit, , is that I’ll be danged if I’m going to roll up all those lines and put them all nicely back in the tiny plastic case. Life’s too short and those strands are too long. So, this is where mine stay, and the lines drape over the top and down the back of this toolcase. The magnets are stuck onto this chest in the bottom left of that image below.
Frame companies help or hurt themselves by how hard they make this process. If you’re going to use vinyl lining, like QR does in this bike I’ve been working on, I’d like to know over time how well that lining weathers. In some bikes I’ve seen that lining get brittle and break inside the bike. I’d like to know that the lining used isn’t going to suffer that fate because if it does, how are you going to get new shift and/or brake cable through the frame? This vinyl lining is a performance product.
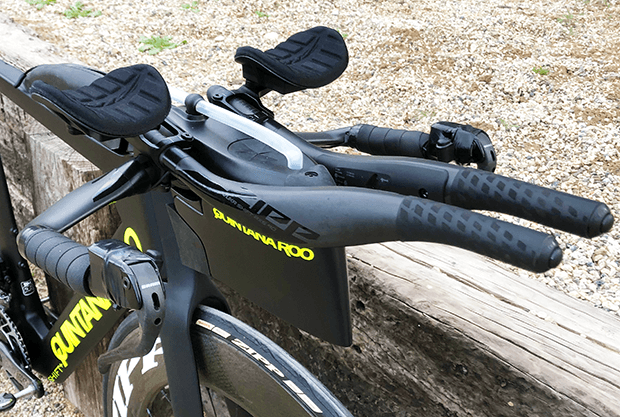
In the case of this QR bike, the routing for the hydraulic lines look as if they were made for a pursuit bar that had a routing hole like this Zipp bar has. Both hydraulic brake lines came up through or just behind the stem, and the stem on this bike was made for that rear brake line to feed right into the back of the stem, without getting pinched or pulled when the handlebars turn.
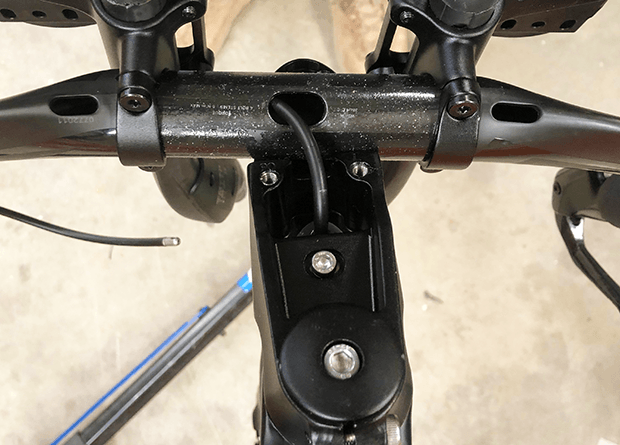
Both these lines routed right into that pursuit bar's port, and if you look at the custom stem on this QR superbike (above), the hole in the stem perfectly matched up to the port you see in this handlebar.
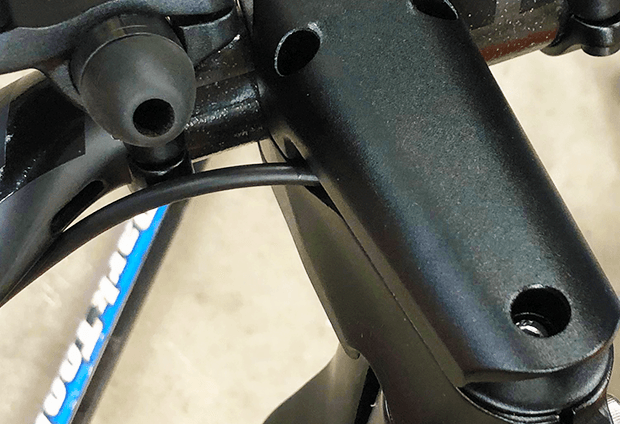
Now, if the brakeset we're hanging on this bike wasn’t a hydraulic system, but used a cabled system, then both the frame and the aerobars have exit ports that allow the brake housing to leave the stem, briefly see the light of day, and enter the side of the stem (image below), thereby making less of a sharp turn as they move from pursuit bar to frame.
Whether brake or shift cable, I put light grease on the cable. We need every bit of help we can get on these long runs, especially shift cables, as they go from the ends of the aerobars back to the derailleurs. The rear shift cable is typically about 220mm or so long for a tri bike, that long cable is what’s needed to run that distance, and they won’t shift well unless they pass very freely inside the housing or liner.
I’m a big believer in electronic shifting for triathlon, and this is one of the reasons: these long cable runs, coupled with internal routing. Obviously there’s a price barrier, and this is why I’ve been nagging bike makers for a stripped down model, bare bones, entry level, with the exception of bar-end electronic shifting. Just that one upgrade.
Until that time comes, you’ll need to deal with internal routing (and you'll need to deal with it anyway, unless brakesets someday become electronic and wireless). You must “deal” with this by handling it yourselves, using whatever counsel above might help you; or you can take this to your LBS of course and let them deal with it; or, you can let your mechanic come to you, such as those comprising the national network of Velofix mobile mechanics.


Start the discussion at forum.slowtwitch.com